ASP.NET中的Identity是授权验证的基本方式。在Net Core时代我们仍然可以使用这种机制来开发授权的站点,下面我以ASP.Net Core 3.0为例介绍如何使用这种机制来开发出一个授权用户登录的站点。本篇内容同样适用于ASP.Net Core 3.0的MVC和 Razor Pages站点。
开发过程如下:
(1)新建一个ASP.Net Core MVC项目。
(2)在Startup类的ConfigureServices方法中启用Authentication中间件并对Cookie做一些基本配置。代码如下:
 // This method gets called by the runtime. Use this method to add services to the container.
        public void ConfigureServices(IServiceCollection services)
        {
            services.AddAuthentication(CookieAuthenticationDefaults.AuthenticationScheme)
              .AddCookie(CookieAuthenticationDefaults.AuthenticationScheme, config =>
              {
                  config.Cookie.HttpOnly = true;
                  config.ExpireTimeSpan = TimeSpan.FromMinutes(10);
                  config.Cookie.SameSite = SameSiteMode.Lax;
                  config.LoginPath = "/Account/Index";
                  config.AccessDeniedPath = "/Account/AccessDenied";
                  config.LogoutPath = "/Account/LogOff";
                  config.SlidingExpiration = true;
                  config.Cookie.Name = "demo";


                  //config.Events = new CookieAuthenticationEvents
                  //{
                  //    OnRedirectToLogin = redirectContext =>
                  //    {
                  //        redirectContext.HttpContext.Response.StatusCode = 401;
                  //        return Task.CompletedTask;
                  //    }
                  //};
              });

            services.AddControllersWithViews();
        }
(3)全局启用身份验证
在Startup类的Configure方法中添加RequireAuthorization(); 方法,代码如下:
app.UseEndpoints(endpoints =>
            {
                endpoints.MapControllerRoute(
                    name: "default",
                    pattern: "{controller=Home}/{action=Index}/{id?}").RequireAuthorization();
            });
(4)添加授权中间件(app.UseAuthentication()),注意顺序千万不能错。
 public void Configure(IApplicationBuilder app, IWebHostEnvironment env)
        {
            if (env.IsDevelopment())
            {
                app.UseDeveloperExceptionPage();
            }
            else
            {
                app.UseExceptionHandler("/Home/Error");
            }
            app.UseStaticFiles();

            app.UseRouting();

	//这两个方法千万要仔细
            app.UseAuthentication();
            app.UseAuthorization();

            app.UseEndpoints(endpoints =>
            {
                endpoints.MapControllerRoute(
                    name: "default",
                    pattern: "{controller=Home}/{action=Index}/{id?}").RequireAuthorization();
            });
        }
(5)这一步也是十分重要的,不然页面会进入死循环
在我们的登录控制器上添加上允许访问标签 [AllowAnonymous]
 [AllowAnonymous]
    public class AccountController : Controller
(6)登录页面的实现,这里只使用简单的样式
<div class="container login-body">
        <div class="row mx-0 justify-content-center align-items-center w-100">
            <div class="col-6 col-offset-3">
                <div class="card m-auto">
                    <div class="card-body">
                        <p class="card-text" style="color:red;">@Model.Message</p>
                        <form method="post" action="@Url.Content("~/Account/Login")">
                            <div class="form-group">
                                <label for="username">User Name:</label>
                                <input name="username" type="text" class="form-control" required placeholder="admin" id="username" />
                            </div>
                            <div class="form-group">
                                <label for="pwd">Password:</label>
                                <input name="password" type="password" placeholder="123456" required class="form-control" id="pwd" />
                            </div>
                            <div class="form-check">
                                <label class="form-check-label">
                                    <input class="form-check-input" type="checkbox"> Remember me
                                </label>
                            </div>
                            <button type="submit" class="btn btn-primary">登 录</button>
                        </form>
                    </div>

                </div>
            </div>

        </div>
    </div>
(7)后台登录逻辑的实现
 [HttpPost]
        public async Task<ActionResult> Login(string username, string password, string returnUrl = null)
        {

            if (username.Equals("admin") && password.Equals("123456"))
            {
                var userClaims = new List<Claim>() { new Claim("username", username), new Claim("password", password), new Claim("roles", "") };
                var grandmaIdentity = new ClaimsIdentity(userClaims, CookieAuthenticationDefaults.AuthenticationScheme);
                var userPrincipal = new ClaimsPrincipal(new[] { grandmaIdentity });
                await HttpContext.SignInAsync(CookieAuthenticationDefaults.AuthenticationScheme, userPrincipal, new AuthenticationProperties
                {
                    IsPersistent = true,
                    ExpiresUtc = DateTime.UtcNow.AddMinutes(240)
                });
                //return NoContent();
                //return View("Index");

                return Redirect("/home/index");
            }


            string url = $"~/Account/Index";
            if (!string.IsNullOrEmpty(returnUrl))
            {
                url = url + "&returnUrl=" + HttpUtility.UrlEncode(returnUrl);
            }
            return View("Index",new AccessViewModel() { Message="账号或密码错误!"});
            //return NoContent();
        }
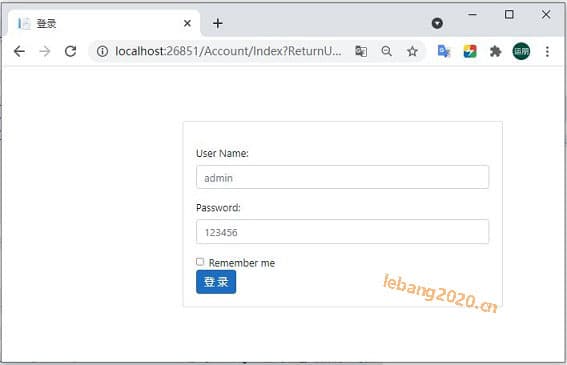
经过上面的一系列代码,我们的登录功能已经实现,如下图:
同时我再补充一下,登出时可以直接调用: await HttpContext.SignOutAsync(); 为了保证登出成功,一般我们可以手动清一下cookie,代码如下:
 Task.Run(async () =>
            {
                await HttpContext.SignOutAsync();
            }).Wait();
            HttpContext.Response.Cookies.Append("name", "",new CookieOptions
            {
                Expires = DateTime.Now.AddMinutes(-10),
                Domain = Request.Host.Value,
                SameSite = SameSiteMode.Lax,
                IsEssential = true
                ///Path = "/"
            });
我已经把代码打包放到了百度云盘里,同时包含MVC和Razor Pages项目,两个效果一样。下载地址:链接:https://pan.baidu.com/s/1L2Skeiwt6WRUUjaF49efmw
💰 此内容为付费阅读 请先登录